purple background

purple background

Showing posts with label Heat Transfer Vinyl. Show all posts

Wednesday, April 9, 2014

I am back!!

Hello my crafty friends,

 I cannot believe I have not posted anything since November 2012.  I started a new position at my job the beginning of last year and took a small break from crafting to absorb my new role. It was not easy staying away from the craft room, each 
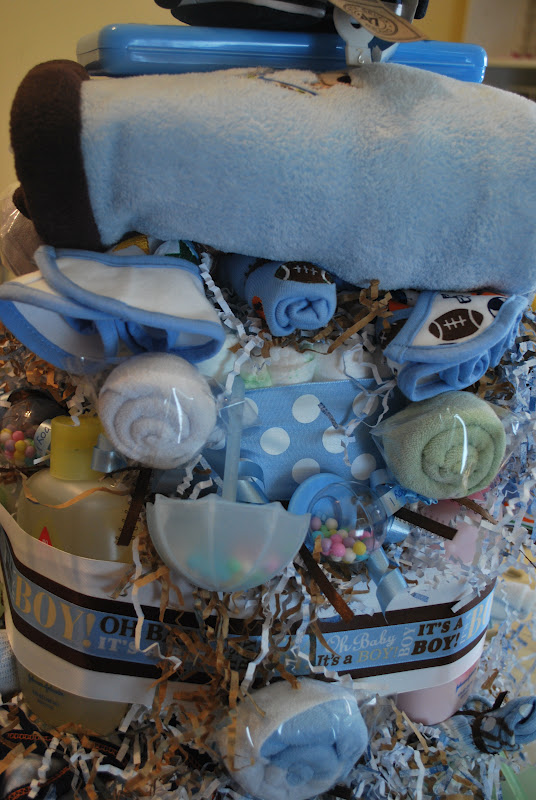
time I passed my craft room I could hear my supplies calling my name, LOL!  So while I was away I still completed a few projects.  I completed two diaper cakes, hosted and coordinated decorations for my family reunion,  coordinated decorations for my niece sweet 16, created Mother’s  Day and Father’s Day gifts for my church, hosted a DIY Christmas ornaments with the kids at my church and most recently completed a towel cake.  As you can see I still hand my hands in the craft room and I am back.

Today I will share my diapers cakes that I created last year.  One is a Teddy Bear-wagon diaper cake for my God-Daughter, husband and baby Maddox.


The second diaper cake was for my sister’s God-daughter and we created a princess diaper cake.


I will share I hope you enjoyed and thank you for coming by.

~~Netta~~


Saturday, November 3, 2012

My First Disney T-shirts

Hello my crafty family and friends,

Today I am sharing Disney T-shirts I made for my co-worker Amy.   As you can see they are going to my favorite trip destination Walt Disney World. 


I am so excited for her kids that I asked to sneak me in their suitcase; I will be a quiet tag-a-long..lol.   These t-shirts were easy to make, however getting the stamp of approval from Amy’s daughter Isabella had me sweating.  Amy is a scrapbooker too; I know she will be taking that perfect photo-op to make magical memories.   So, Amy and family have a blast on your first Disney Trip.

Recipe:
Red tshirts
Mickey ears silhouette
Make-that-Cut
Heat Transfer Vinyl (black, yellow and red)
Heatpress
Waltograph Font

I hope you enjoyed and thank you for coming by.
~~Netta~~

Monday, June 25, 2012

Orlando 2012 T-Shirts

Hello my crafty friends,

I am sharing t-shirts I made for my Orlando trip.
I have to admit it was a love-hate relationship with my new KNK Zing.  I have to use both Expression 2 and Zing to complete the job.  With that said, the Zing beat the Expression 2 hands down with the more intricate cuts that I used on Shamu. 


By the end of making the tshirts, my understanding and learning curve for the Zing definitely improved.

I tried the JetPro transfer paper on this t-shirt.  The process is quicker to create and produce the t-shirts. 
Sorry this is blurry, will post clearer picture

I will be posting the group pictures of the t-shirt as the trip proceeds.


Recipe:
Blank Gildan t-shirts (black, iris, gold color)
VideoOne Transfer Vinyl (varies colors)
Siser Easy Weed Vinyl (varies colors)
MAke-That-Cut
KNK Zing 
JetPro Soft Stretch Ink Jet Transfer Paper
Heat Press Machine
Picasa3
Inkscape

I hope you enjoyed, thank you for stopping by
~~Netta~~

Friday, June 8, 2012

Oh What New Things I Have.

Hello my crafty friends,

Today I am sharing t-shirts I made with my two new machines.

I have been researching heat press machines and a new die-cutting machine.  Proworld had a good deal during the Memorial Day weekend, in which you buy a specific amount and get a discount on the heat press machine so I jumped on it.  I was intimidated by the heat press  machine, however after completing my first t-shirt job I asked myself why I did not buy it sooner. 


I have been a loyal cricut customer for a long time.  When the company stops supporting non-cricut software it limited my options to design, I started  research on various die-cutting machines.  I gave my husband a wish list for my birthday/Mother’s Day gift. I was very surprised to receive this in the mail Wednesday. 
Even more surprised because I just ordered the Silhoutte Cameo over the holiday weekend.  The Cameo is currently on back-order until the end of June, I will probably cancel that order. 

The KNK-Zing die-cutting machine is the total opposite of the cricut and cutting layout so now I have to retrain my brain..lol.  Making these t-shirts was my first project using both machines.  It is definitely a new learning curve but I absolutely love the way it cuts the vinyl. 
Here are Dr. Seuss’s Thing 1-Thing 6 t-shirts I made for my co-worker.


Recipe:
Gildan Red T-Shirt (youth L,M,S, 3T, 18M, 12M)
Heat Transfer Vinyl (black and white)
Dr,Seuss Thing "1" clipart
Make-That Cut
Boopee True Font


I can not wait to try other materials on the KNK Zing.  I am planning to keep my Expression 2 to have more options.  Now on to my vacation t-shirts and reorganizing my scrap office again.

I hope you enjoyed, thank you for stopping by,
~~Netta~~

Thursday, March 29, 2012

Max's Diaper Cake

Hello my crafty friends,

We are still in baby season; here is Prince Maxwell Diaper Cake.  
My cousin absolutely loved it. She did not want to open it.  My sister Athena (Toosie) is learning to make the diaper cakes as well.  When we are finish with all five she will be a pro at it..LOL..Again we added extra perks (outfits, onsies, baby towels and burp clothes) in the cake, so I reminded her to open it..LOL!! I made the baby and his sister t-shirts and monogram piggy banks too.
Touch of Cricut “Max”


Rolled T-Shirts


Touch of Rolled Baby Towel Lollipops

                                         Rolled Baby Socks Rose Bud
Monogram Piggy Banks


Recipe: Diaper Cake
-Cricut CM Stork’s Delivery
-14’ Cake bottom
-Rolled Diapers (newborn, size 1 and size 2)
-Rolled Burp Towel
-Rolled Baby Towel
-Rolled Baby Blanket
- Rolled Baby Socks
-Baby Wipe Case
-Ribbon
-Baby Shower Favors (umbrellas, pacifiers, rattles and bottles)
-Treat bags (small and medium)
-Lollipop sticks
-The Good Collection Paper- Lil Man and Champ
-Card Stock (blue and white)
- Chalk and Mix’d Media Inks
Ceramic Piggy Banks
-Outside Vinyl (pink, purple, blue and green)
-Cricut Expression2 and Gypsy

I hope you enjoy. If you have any questions send me a quick email
~~Netta~~

Thursday, August 4, 2011

Heat Transfer Vinyl


Hellur my crafty friends,
I wanted to drop of two t-shirts I made with Heat Transfer Vinyl.  I made both sets of t-shirts for my annual Orlando Vacation.


Recipe used: 
Prewashed T-shirts without detergent or fabric softener
Cricut Expression 2
Gypsy
Cricut Mickey Font Cartridge
Cricut Cindy Loo Cartridge
Siser Easy Weed Heat Tranfer Vinyl (pink, white, royal blue, red, black and violet) from http://www.hhsignsupply.com/productcart/pc/Siser-EasyWeed-c523.htm
Parchment Paper
Iron
Directions:
1.Created my design on my Gypsy
2.On the Gypsy remember to reverse (mirror-cut) your design
3.Place Heat Transfer Vinyl on Cricut mat, with shiny side facing down
4.On the Expression 2, I used the Kiss-Cut setting.  On the expression you can set your blade:3, pressure:3 and speed 1-2(depending how intricate your cut will be)
Note: the Kiss-Cut will not cut through the back of vinyl
5.Weed excess vinyl from your design
6.Preheat iron to “Cotton” setting, no water added
7.Lightly iron t-shirt
8.Place weeded vinyl design on T-shirt, shiny side facing up
9.Cover vinyl with parchment paper and apply light pressure of the iron
10. Gradually increase pressure for 1-2minutes and iron around design. Note move iron to prevent burning of vinyl
11.Allow Vinyl to cool for 5-1ominutes, you will know the vinyl has adhered to the t-shirt when the plastic
(shiny covering) of vinyl easily peel off

For Layering
Follow the above steps
12. Allow vinyl to completely cool off
13.Cover any areas with tape or paper that is not being layered
14. Apply layered pieces vinyl to desired areas, remember the shiny side of vinyl should be facing up
15.Cover vinyl with parchment paper and apply light pressure of the iron
16. Gradually increase pressure for 1-2minutes and iron around design. Note move iron to prevent burning of vinyl
17.Allow Vinyl to cool for 5-1ominutes, you will know the vinyl has adhered to the t-shirt when the plastic
(shiny covering) of vinyl easily peel off

Hope you enjoyed, and thank you for stopping by,
~~`Netta~~

Tye Dye T-Shirts

 I started this post in July and did not have to chance to finish it.  I have made three different types of t-shirts this summer, Tye-Dye, Heat Transfer Vinyl and Silk Screen. 
Here is my Mickey’s Tye-Dye Tshirt

Recipe used:
Prewashed T-shirts
Tulip One Step Tye Dye Kit (blue, red, yellow, green, black, purple and fushia)
Plastic gloves (some comes in kit)
Rubber bands (some comes in kit)
Wax dental floss
Cricut Mickey Font Cartridge
Freezer paper
Rubber bin
Plastic bags

Directions:
Mickey Mouse Head Tye-Dye:
1. Pre-washed t-shirts without detergent or fabric softener
2. Cut freezer paper Mickey Head from Mickey Font Cartridge to trace outline
3. Next, used wax dental floss to sew around the center of the t-shirt

4. Next, pulled the dental floss tightly; for a clear and well defined, puckered Mickey shaped head (picture)
5. Next, placed rubber bands underneath the Mickey head to get a good border around Mickey’s head
6. Soaked the T-shirts in cold water for 6hrs (you can soak with soda ash and soak overnight)
7. Next, squeeze out the water and spread t-shirt out on table with Mickey’s head facing up
8. Next, taking the Mickey’s Head in hand, twist the t-shirt similar to a circular (cinnamon) bun. You may have to straighten out tsirt while you are twisting.
9, Once the t-shirt is in a circular bun, place rubber bands to hold in place (this will also make designs from the dye). I used four rubber bands per t-shirt
10. Next, turning the t-shirt upside down, first tye-dye the Mickey head black staying away from sectioned off rubber bands
11. Next, place t-shirt down, using multiple colors, tye-dye the rest of tshirt following the direction of circular bun
12. Separately wrapped sealed each t-shirt and placed in rubber bin for 24hrs

13. After, achieving the desired colors, I rinsed out t-shirts with cool water.  Rinsed Mickey Head (black dye) first to prevent contamination, then rinsed out the rest of dye
14.  Then, separating like colors, run them through the washing machine on cold water cycle. I placed an old towel in the wash to pick up any excess dye.
15. Lastly, allow each t-shirt to air dry

I will discuss the Heat Transfer (iron-on) vinyl in next posting,


Hope you enjoyed, and thank you for stopping by,
~~`Netta~~

My Creations

LinkWithin

Related Posts Plugin for WordPress, Blogger...