purple background

purple background

Thursday, November 24, 2011

All About Flowers Series


Happy Thanksgiving scrapping friends!!

I am wishing everyone a Blessed and bountiful Thanksgiving.  I am thankful for the love of my family and friends and for all the blessing in my life.  I will be spending quality time with my family today, sharing great food, conversation and laughter.

I have taken a few classes over at My Creative Classroom and have a couple more to go.  I am finishing up with the All About Flowers Series, and it has been a lot of fun learning new techniques.

In this series, I molded flowers from duct tape, grunge paper and leather strip.  


 Duck Tape Flowers

Directions:
-Fold the duct tape in half leaving a 1/4 difference between the two pieces.
 -Begin to accordion fold or if you sew gathering the tape.
- Continue to gather the tape it will stick to the edge you left exposed so no need to glue it until you are finished.
-Once you get to the end you attach the end tape to the pleats to create a circle.
-Take the other longer pleated piece and twist it toward the middle tightly once in place glue the center area

Leather Flowers


Stamped Grunge board Flower


Grungeboard Roses


 Recipe:
Grunge board paper
Stamped grunge board
leather strips 1
 18” Printed Duck tape
Hot glue gun
Distress inks
Viva Paint
Spritz smooch
Brad

I hope you enjoy. If you have any questions send me a quick email
~~Netta~~

Wednesday, November 23, 2011

All About Flowers Series

Hello scrapping friends,

I cannot believe Thanksgiving is tomorrow. Where did November go? I have taken a few classes over at My Creative Classroom and have a couple more to go.  I am finishing up with the All About Flowers Series, and it has been a lot of fun learning new techniques.

In this series, I made flowers with miscellaneous items around the house.  Let just say I will look at plastic spoons, old jeans, raffle tickets and old clothes differently.


Plastic Spoon Rose
Directions:
-Cut 10-15 clear plastic spoons using a wire cutter about 1 inch from the handle.

 -Use copic markers RV17 to color all plastic spoons.

-Heat the bottom of the spoon with a heat gun until it curls and melts and molded each melted spoon to form a petal. Allow to cool

 -Melt the first layer together using 6 petals.  It may be easy to use 2-sets of 3 petals and melt them together Allow to cool

-Melt the first layer together using 4 petals.  It may be easy to use 2-sets of 2 petals and melt them together

-Use a copious amount of hot glue and heating tool to adhere the bottom and middle layer. Offset the petals, allow to cool

-Melt 3 petals together to make the rose bud

-Use a copious amount of hot glue and heating tool to adhere the rose bud and middle layer and let cool


Denim Frayed Flower
Ticket Stub Flower


Recipe:
Copic Markers
Old Denim
Ticket Stub
Canvas Strips
Clear  Plastic Spoon
Copic Markers
Brads
Tulle
Hot Glue Gun
Heating Tool
Wire Cutters
Non-stick craft sheet


I hope you enjoy. If you have any questions send me a quick email
~~Netta~~

Thursday, November 17, 2011

Diaper Cake

Hello my crafty friends,

Baby season is in the air for a few of my family members and friends, so I kicked it off with my coworker’s baby Myra Diaper Cake. 
She absolutely loved it.  She did not want to open it and used it as a display at her baby shower with her family and friends.  She had a few extra perks (outfits, onsies, baby towels and burp clothes) mixed in the cake, so I reminded her to open it..LOL!! This was the first time I created lollipop towels and rose buds socks.


Touch of Cricut “Myra”

Side View
Touch of Tissue Paper Flowers and Vinyl

Touch of Crete Paper Flowers 

Touch of Rolled Baby Towel Flowers 


Touch of Vinyl for the bottles, baby wipes case and pacifier


Rolled Baby Socks Rose Bud


Rolled Baby Towel Flowers


Card for Mother and Baby


Recipe:
-Outside Vinyl-( pink, brown and white polka dots and pink)
-Cricut CM Stork’s Delivery
-Cricut Mother’s Day Bouquet
-14’ Cake bottom
-Rolled Diapers (newborn, size 1 and size 2)
-Rolled Burp Towel
-Rolled Baby Towel
-Rolled Baby Blanket
- Rolled Baby Socks
-Bottles
-Baby Wipe Case
-Pacifers
-Ribbon
-Tulle
-Baby Shower Favors (umbrellas, baby blocks, pacifiers, rattles and bottles)
-Spellbinder Scalloped Circles and Labels 8
-Crete paper (pink, brown and white)
-Tissue Paper (pink, brown and white)
-Treat bags (small and medium)
-Lollipop sticks
-Smooch Spritz (log cabin and pink sprinkles)
-Card Stock (pink, brown and white)
- Fairy Dust Glitters (Sugar Shimmer and Pralines & Cream)
- Chalk and Mix’d Media Inks

I hope you enjoy. If you have any questions send me a quick email

~~Netta~~


Tuesday, October 18, 2011

Glittery Garden Class

Hello all,


 I have taken a few classes over at My Creative Classroom and have a couple more to go.  I love their format for the classes and having that deadline has given me that extra push to finish my projects.  
In this Glittery Garden Class by Donna Salazaar, we created a Girlie Grunge mini that shows off different techniques to make a glittery garden.


Page 8  Page 8 Big Bunched Up Blossom

Page 7 3-2-1 Cupped Flowers with Double The Fun Embellies


Page 6 Mixed Media Flowers with Ruffled Lacey Journal Spot 


Page 5 Cute As A Cupcake Flowers with Easy Peasy Flowers


Page 4 Easy Inky-Painty Carnations 


Page 3 Super Chunky Rolled Roses with a Paper Ruffle (Coffee Filter and Crete Paper Flowers)


Page 2 Running Stitch Rosettes 


Page 1 EFG Flowers Emboss & Fairydust Glitter and Easy Peasy Glittery Flowers


Cover Page techniques  Double Butterfly  Shabby-It


Recipe:
-Artistic Paper “Blank Canvas”
-Artistic Paper “Antiquities 6x6” and “Spring In Bloom 6x6”
-Artistic Paper “Journal Cards”
-Antiquities Ribbons
 -Crafty Chronicle Vol. 2
-Spellbinders (Labels Twenty , Lacey Ovals, Donna Salazar’s- -Creative Pages, Fanciful Flight, Rose Creations, and  Carnation Creations)
-Smooch Spritz (River Mossy , Caramel Latte, Green Olive, Sea Breeze , Pralines & Cream , Mixed Berries , Tea Party,  Ice rink, Wild Berries, Cashmere and Evergreen)
-Glue Gloss
-Fairy Dust Glitters (Sugar Shimmer , Pralines & Cream ,Mixed Berries)
-Coffee Filters
-White Crepe Paper Streamers
-White Paper Cupcake Liners
-Ribbon Flowers
-Pearl String
-Tulle
-Variety of Mix’d Media Inx, pigment ink and chalk inks
-White and Clear embossing pads
-Distrezz-it-All


I hope you enjoy.  If you have any question send me a quick email
~~Netta~~

Monday, October 17, 2011

My Vinyl projects

Hello my scrappin friends,

 I had updating my blog on my list to do for over one month and I am finally getting to it. I am going to make a better attempt of keeping this updated. So I am dropping off a few projects I completed.

 Here is a tumbler, water bottle and floating picture frame I made for my Sistas & Bros Scrap Too partner Tonya and her son.


Items used:
Make that Cut
Cricut Gypsy
Cricut Heritage Cartridge
Circut Boys Will Be Boys Cartridge
Outdoor Vinyl (light grey, burgundy, white, royal blue, red, black and green)
Acrylic Tumbler
Water Bottle
ACM 8X10 Picture Frame

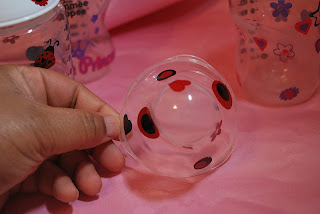
Here are baby onsies and bottles I made for a co-worker


Items used:
Outdoor Vinyl (colors pink, purple, red and black)
Siser Easy Weed HTV (fluorescent raspberry, violet red, black and electric pink)
Make that Cut
Various True Fonts (GiddyUp,SnappIt,Waltograph, and Kinkee)
Cricut Basic Cake Cartridge

Hope you enjoy, come back and visit.
~~Netta~~


My Creations

LinkWithin

Related Posts Plugin for WordPress, Blogger...