purple background

purple background

Sunday, December 25, 2011

Ornaments

 Merry Christmas scrapping friends!!!
I hope Santa Claus was good to all of you and your family.  This is my favorite holiday because the most unselfish gift was blessed unto this world no matter what faith you worship.  “JESUS IS THE REASON FOR THIS SEASON!!”
Here are some ornaments I made from for my Christmas tree and door wreath.
I personalized each family members bulb on the tree
Close up on the wreath
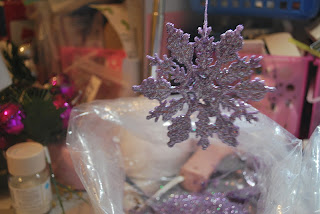
I have become a big fan Pinterest (maybe addicted..lol.  I saw these acrylic pain ornaments and had to try to make them

Recipe:
Clear glass and plastic ornaments
Glitter (M.S. Purple sapphire,hemate,chariote,bubble gum, amethyst, sugar plum, cotton candy,sugar cube, sterling),( D.S. Mixed berries)
Mop and Glo
Acrylic Paint(platinum, silver, violet, deep magenta and titanium white)
Wired 3’inch ribbon
Micheal’s ornaments
Pine cones


Thank you Deshonda “Nubian Crafter NC” for this beautiful handmade ornament.  It was right in the center of the tree for everyone could see and be envious (just kidding)..lol
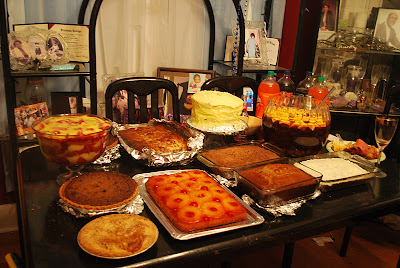
I have been in the kitchen for the last two days preparing my Christmas feast here are a few pictures.  Yummy!!


Again Merry Christmas and I wish you a Blessed and Prosperous New Year!!
I hope you enjoy.  If you have any questions send me a quick email.

~~Netta~~

Tuesday, December 20, 2011

SnowFlake Wreath

Hello my scrapping friends,

Christmas is just a few days away. The little kids are getting excited and parents are double checking the Christmas lists to make sure all the presents are under the tree.  The song,” I 'm dreaming of a white Christmas” is playing in many homes.  Well not mines, although I am a New Englander snow is my least favorite.  I do love watching the flakes fall. 

In My Creative Classroom, I took a class named “It's a Sparkly Spellbinders Holiday!”, and one of the lessons was making this beautiful snowflake wreath.  
If I had to dream of snowy Christmas, this is how I would see it.


Directions:
-First die-cut your snowflakes, I used  the Grand Caliber (it was easier to cut many flakes and saved time) with various spellbinder snowflakes dies (see list below) using grunge paper, chipboard, corrugated cardboard, cardstock, and dictionary paper (Crafty Chronicles).
**Note** I had to run the Grunge Board and chipboard through my grand caliber 2-3 times for it to cut completely
-Crafty Chronicles attached to card stock (to give thickness to paper snowflakes)
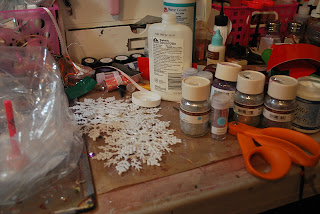
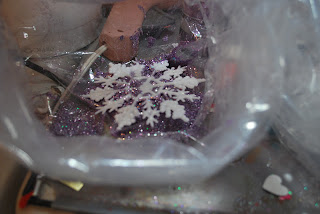
 -Add some shimmer to the snowflakes, brush/dip glitter glue over the grunge boardchipboard, corrugated cardboard and plastic snowflakes and dip or sprinkle them with glitter.  I dipped my snowflakes, attempting to contain the glitter...NOT...lol
-I mixed several colors to make my custom color.

- Let the glue dry


-Wrap the cheesecloth around the  Styrofoam wreath. Layer the cheesecloth until it completely covers the Styrofoam.  **Sorry I did not photograph this step**
-Add 20’ piece of ribbon long and wrapped it around the wreath too make a hanger.  You can use the glue gun or pins to hold in place 


-After the snowflakes dry, arrange or stake them you build a unique look
-Add rhinestones, gems, pearls with hot glue gun or I-Rock

-I used copic markers to color the clear gems

-Arrange die-cut and embellished snowflakes to the wreath I used pins and a
hot glue gun.
**Note**to add some dimension to the snowflakes, layered similar buttons on the wreath with hot glue and then glued the snowflakes on top of the buttons.


Recipe:
Styrofoam Wreath
 1”  Cheesecloth
Grand Caliber
Spellbinders Dies:
  -Create a Flake 1,2, and
 -Snowflake Wonder
 -Snowflake Pendant-2010
 -Ironwork Motifs
4-Tim Holtz Grunge Board
4-Corrugated Cardboard
4-ChipBoard
4-White Cardstock
Donna Salazar Crafty Chronicles
Metal
White Plastic snowflake ornaments
Glitter (M.S. Purple sapphire,amethyst, sugar plum, hemate,chariote,bubble gum, cotton candy,sugar cube, sterling),( D.S. Mixed berries) and Rose grain
Glitter Glue
Ribbon
Copic markers
 Pearls and Rhinestones,
Quilt Pins with bead heads
Hot Glue Gun
I-Rock
3D Dots or Foam Tape
Adhesive

I hope you enjoy. If you have any questions send me a quick email

~~Netta~~


Wednesday, December 7, 2011

All About Flowers Series

Hello my scrapping friends,

I am really enjoying my All About Flowers class over at My Creative Classroom.  This week was all about paper flowers.  These flowers are ideal for all crafters, there is endless ways of creating paper flowers from cutting cardstock, using punches, die cutting machines or spellbinders to name a few.


I am finishing up with the All About Flowers Series, and it has been a lot of fun learning new techniques
Folded Rosettes 
Rolled Spiral Flowers (cardstock and felt)
Photo Corner Flower
Directions
-Punch small circle
- cut one 6x6 piece for this flower 2x2 squares
-Take the 2x2 squares and cut in1/2 diagonal corners
-Ink the edges
-Fold each point to the opposite mid-point (alternate color) **NOTE** The 3 different types of petals--you will need 8 petals 4 one type 4 he opposite
-Fold the bottom the opposite direction and curl end
-Add the first layer in a East-West-North-South position to small circle
-Add the second color in between the first layer stagger from first layer
-Add the spiral flower to the center
-Add the diamond dust on the petal edges.
Star Flower
Rolled Die Cut Flower
Dictionary Flowers
Recipe
4” x 4” scrap of cardstock or patterned paper
Felt
Donna Salazar Crafty Chronicles
Spellbinder  spiral blossom and rose creation
cuttlebug
Button or Bling for flower center (optional)
Strong Liquid glue (i.e. Hot Glue, Beacon’s 3 in 1, Fabri-Tac, Zip
Dry, Craft Glue Dots)'
Epiphany Crafts Tool with Matching Buttons or Bubble Caps
Stamp image
distress inks 
Spritz
pencil
stickles crystal
5 flowers smallest to largest
Scissors
Glossy accents
Cardstock paper flowers using die cuts and paper strips
tweezers
chalk ink brown and lavender
Diamond Dust Glitter
Scissors
12x12 trimmer
Glossy accents
Brads

I hope you enjoy. If you have any questions send me a quick email

~~Netta~~

Thursday, December 1, 2011

All About Flowers Series


Hello my scrapping friends,

I am really enjoying my All About Flowers class over at My Creative Classroom.  This week was all about rolled roses and rosettes. I am finishing up with the All About Flowers Series, and it has been a lot of fun learning new techniques.


 In this week series we I used Ribbon & Trims, Rolled Ribbon Rose and Crepe Paper.
Rolled Ribbon Roses


Twisted Crepe Paper Roses


Directions:
-Roll one end of the ribbon into a tube, about 3 layers of ribbon thick. Add a small drop of hot glue to secure placement.
- Fold the ribbon to the outside and start wrapping around the tube. Continue folding back the ribbon every 1/2 turn or so. You should see the rosebud starting to form. You can add a drop of hot glue in between hold back if you want. -Continue to the end of the ribbon
-Turn the rose over and secure the back with hot glue, putting glue under the folds if need be
-Add gems or buttons to the center to spice it up if you want

Doily Rosette

Directions:
-Thread needle
-Tie both ends together doubling the thread and tie into a knot twice.
-Start doing a running stitch 1/16th a inch from the edge about ¼ inch apart
-Continue the running stitch the whole length of the lace you can push the lace back on thread while continuing the length of the lace.
Directions
-Tie the two pieces together and gather tightly
-Continue the gathering and make sure to keep your stitch evenly spaced out.
-Add center ribbon bow, pearls or rhinestones gems you could 


Wired Ribbon Rosette


Recipe:
Stiff Grosgrain Ribbon, and 1 yard
Glue Gun
Crepe Paper-2 different colors
Lace with a scallop edge 8 inches
Satin ribbon ¼ inch for the bow.
Gem or Ribbon
Needle
Thread
Wire Cutter


I hope you enjoy. If you have any questions send me a quick email

~~Netta~~

My Creations

LinkWithin

Related Posts Plugin for WordPress, Blogger...